
You raced to get to the fun part of the assembly of your fire-pit = the tiling. The time when the gray sheet-rock gets transformed to a beautiful butterfly. But wait- how do you handle the tiling when you have an uneven ground surface to work with? Follow these 3 steps to deal with this the way professional tillers do.
STEP 1
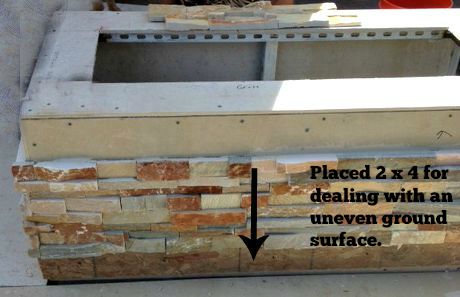
Screw a temporary 2×4 around the bottom perimeter to establish a level line like shown in the above picture. The heights of the 2×4 from the ground shall not exceed the height of one piece of tile.
STEP 2
Continue on to tiling above the 2×4.
STEP 3
Remove the 2×4 when the mortar is set and the stones are secured. Now tile to the floor. It’s likely you will need to make cuts to the stone of the bottom pieces to accommodate the slope of the ground.
At https://diybackyardplanning.com/product/fire-pit/ you can find step-by-step assembly fire-pit plans as well as recommend burners to go with the plans.
DIY Backyard Planning provides downloadable assembly plans to create pergolas, gazebos, outdoor TV cabinets, fire pits and outdoor kitchens.